—TechRound does not recommend or endorse any financial, investment, gambling, trading or other advice, practices, companies, operators, digital services or products. All articles are purely informational—
Hiring a photographer sounds great in theory. Then you get the quote.
Studio time, travel fees, editing costs, licensing, for a small brand just trying to get its first 20 products listed properly, that bill adds up to something between “painful” and “absolutely not.” And yet, terrible product photos are silently killing sales every single day for brands that are otherwise doing everything right.
Good news: you don’t need to hire anyone. Seriously. The gap between “professional photographer” and “small brand owner with a phone and the right AI tool” has closed dramatically.
The Real Problem With DIY Product Photos (And Why It’s Fixable)
Most small brand owners try the DIY route, hit a wall, and conclude they just “don’t have an eye for it.” That’s almost never the actual problem.
The actual problems are usually much more boring:
- The background is too busy; a table, a floor, a random object that crept into frame
- The lighting is uneven; one side of the product is bright, the other looks muddy
- The photo looks flat; no depth, no context, nothing to make the product feel desirable
These aren’t creative failures. They’re technical issues, and technical issues have technical solutions. The reason professional photographers produce great product photos isn’t magic, it’s controlled lighting, clean backgrounds, and proper scene composition. AI can now handle all three of those things on your behalf.
What You Actually Need to Start
Here’s the honest minimum viable setup for a small brand:
- A smartphone with a halfway decent camera (anything from the last three years works fine)
- Decent natural light; a window will do the job
- A free account on an AI photo tool
That’s it. No ring lights. No seamless paper backdrop rolls. No $800 mirrorless camera. The AI is going to do the heavy lifting on everything that used to require studio equipment, so your job is simply to give it a workable starting image.
The one thing worth spending five minutes on before you shoot: clean your product. Smudges, fingerprints, dust, loose threads, the camera picks them all up and the AI doesn’t always clean them out. Thirty seconds with a microfiber cloth saves you a lot of headache later.
Built For Sellers, Not Designers
Designkit is an AI design platform made specifically for e-commerce. Not for graphic designers. Not for marketing agencies. For people selling actual products online who need great images fast and don’t have a design team behind them.
Its AI product photography generator is the tool doing the real work here. You upload a phone photo, messy background, mediocre lighting, whatever you’ve got and within about 10 seconds, it gives you a studio-quality result.
The AI reads the product’s category and material automatically, then recommends scenes that actually fit. A skincare serum gets a clean, clinical backdrop. A handmade candle gets warm, Nordic-style ambient light. A kitchen gadget gets a styled countertop setting.
It’s not guessing randomly. It’s making informed choices based on what the product is.
Step-by-Step: From Phone Photo to Professional Result
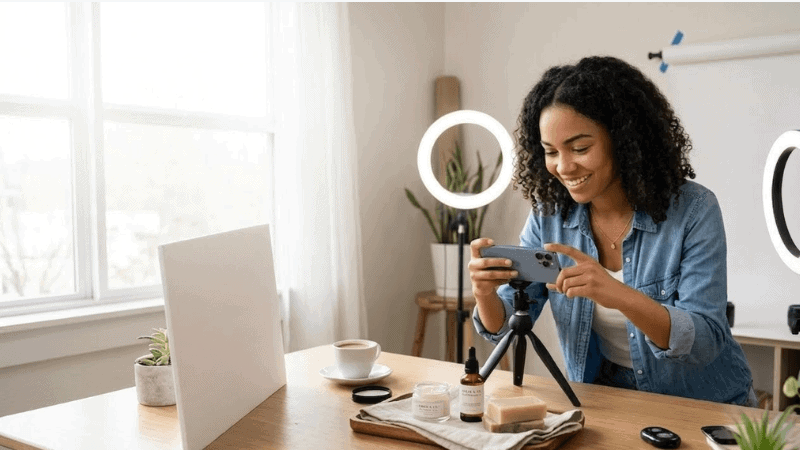
1. Shoot the product at home
Find the best natural light around you. A window usually works well. Morning or early afternoon light often looks the best. Place the product near the window. Let the light hit it from the side. A slight front angle also works.
Side lighting shows texture. Light from straight ahead often flattens the product.
Keep the camera around eye level for most items. Go slightly above for flat products such as clothing or food. Take five or six photos from different angles.
2. Upload to Designkit’s AI product photography generator
Head to Design Kit Product Photography Generator. The free tier gives you 20 credits on signup, no credit card needed. Drag your photo in, or click to upload. Batch upload is also available if you’re working through a product catalog. Then, enter prompt.
Designkit’s AI analyses the image and recommends 3 to 5 scene options within seconds. You can accept one of those.
3. Generate and review
In roughly ten seconds, the image is ready. The AI cuts out the background. It places the product into a scene and adjusts the lighting. Shadows are recalculated so the product fits the environment.
The first result may not be perfect. Generate another one. Each attempt creates a different scene layout.
4. Export at the right resolution
For most e-commerce platforms, 2K is the practical sweet spot. It clears Amazon’s minimum image requirements and stays within typical file size limits. Go to 4K if you need detail shots for A+ content or product pages where shoppers are zooming in on texture.
What Kind of Photos Do You Actually Need?
This is where a lot of small brands underplan. They get one good hero image and call it done. Most platforms, Amazon especially expect a full image set per listing.
| Image Type | Purpose | Platform Priority |
| White background main image | Primary listing thumbnail | Amazon, eBay, TEMU — required |
| Lifestyle / scene image | Shows product in context | All platforms, high-converting |
| Detail / texture close-up | Builds trust, reduces returns | Shopify, Amazon A+ content |
| Flat lay / overhead | Great for fashion, food, accessories | Etsy, Pinterest, Instagram |
| Scale reference shot | Shows actual product size | Any product where size matters |
—TechRound does not recommend or endorse any financial, investment, gambling, trading or other advice, practices, companies, operators, digital services or products. All articles are purely informational—